
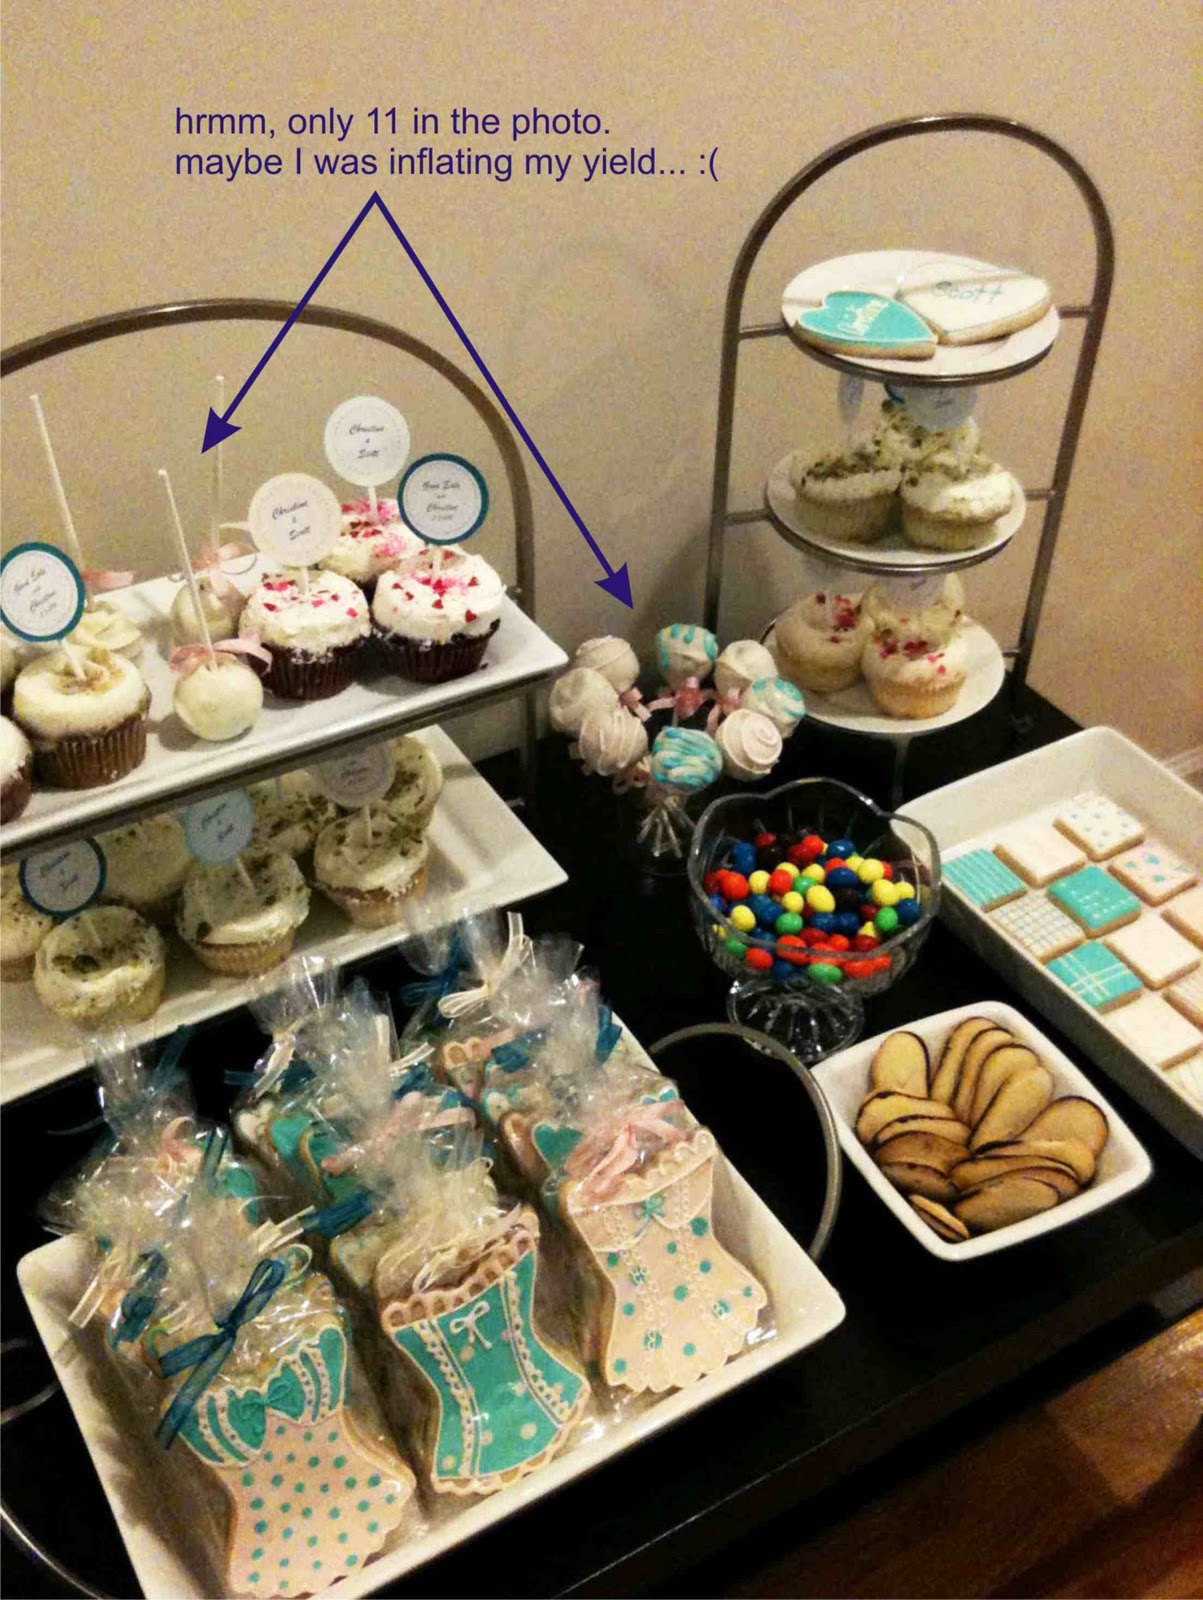
If it makes you feel better, my first batch of cake pops yielded 14 presentable cake pops at the shower (theoretical yield is 40 cake pops/batch giving me a percentage yield of 35% - in this were a chemical experiment, my first yield would be objectively categorized as poor).
BASIC CAKE POP TUTORIAL
Yields 35 - 40 cake pops
1 baked cake
3/4 - 1 cup frosting
Candy Melts
Lollipop Sticks
Styrofoam blocks
Some personal comments:
- To save time, you can just bake a box cake mix. It's all going to get mashed up anyways so this part is entirely up to you. You can bake it as 1 cake or as 48 cupcakes. Be as masochistic as you like. I prefer to bake my cake in a deep 9" pan so that there's a higher inside cake to outside cake ratio (do you know what i mean? if you make the cake bigger and flatter there's more surface area ie. outside cake parts. This is totally a personal preference and I also like to add nerdy references if at all possible).
- If you're buying store bought frosting, you're going to use about 1/2 the can (more on this later). The above measurement is if you're making homemade frosting
- If you use Wilton's candy melts, you're going to need 2 bags per batch of cake pops.
- I have been using 4" lollipop sticks these days but only because I found a site online where I bought it bulk for really cheap. (Uhm...so here's where I confess to you that by bulk I mean I bought 12,000 sticks. Feel free to e-mail me if you want to buy some off of me...I think I went a little overboard). I've used 6" sticks in the past and it's the same thing.
- Styrofoam blocks work best and you can re-use them over and over but if you don't have them you can always use mugs/cups in a pinch. Just make sure that they're short enough that the cake pop won't touch the sides of the glass but not too short or the bobble headed cake pops fall over from the weight. Otherwise you'll just end up standing in the middle of your kitchen waving cake pops in either hand until they dry....true story.
I've tried to use a spatula and be dainty about it. But nothing gets it all mixed and mashed and incorporated as rolling up your sleeves and just getting your hands dirty (metaphorically - please use gloves as other people will be eating this!) Really mix in the icing well. I would start with the 3/4 cup (or 1/3 container) and then add as needed. I find it gets too sweet with too much icing plus you'll be covering them in candy melts later. You want just enough to bind the cake together to form balls. Too much and the mixture gets very soft and hard to handle. Too little and the balls don't really roll well and you end up with lumpy parts that look ugly when dipped. You can always test a few out and see what you like before you roll the rest.
 |
| Those little blue and red spots are rainbow chocolate chips. Just so you don't get freaked out. |
I used a tablespoon to scoop out mixture and make sure that all the balls are relatively even in size. Depending on how accurate I am is what affects my theoretical yield from 35 to 40 (not including the failed attempts in later steps).

3. Place the cookie sheet into the fridge for an hour to firm up.
A lot of sites recommend covering the batch up with a sheet of saran wrap...I haven't found any issues without doing this but I think its because I only leave it in the fridge for an hour. If you're crunched on time you can leave these cake balls in the fridge even overnight until you're ready to coat in the candy melts - in which case, then yes I'd cover them up to keep them from drying out.
4. Remove cake balls from the fridge. While they are thawing, heat your candy melts in the microwave (follow the directions on the back of the bag).
BE CAREFUL NOT TO OVERHEAT YOUR CANDY MELTS. They're really sensitive and most people are prone to just melting the crap out of them. Microwave them in 30 sec (or less) increments and then take it out and stir. You'll find that they keep melting even out of the microwave. (Shall I bring up le Chatelier's principle? for some reason this theory has been applicable a lot lately but the usual response from my friends is "omg..." so i'll stop here). You don't want the candly melts to be super hot. Just warm enough to melt. If the candy melts are overheated, they "seize" - literally like a candy tantrum they just kinda shut down and start getting thick and weird. So be careful at this step.
Also, while you're melting the candy, you want your cake balls to sorta thaw a little. You want them chilled but if they're too cold, the temperature difference between the cake balls and candy melts is too high so you ended up with cracks in your candy coating (Geeks: minimize your delta!)

*Note: if you want to add sprinkles, get them ready now as you have to do it while the candy is still wet
5. Dip your lollipop sticks into the candy melt and then insert into a cake ball. Place back on cookie sheet to set (candy melt to harden)
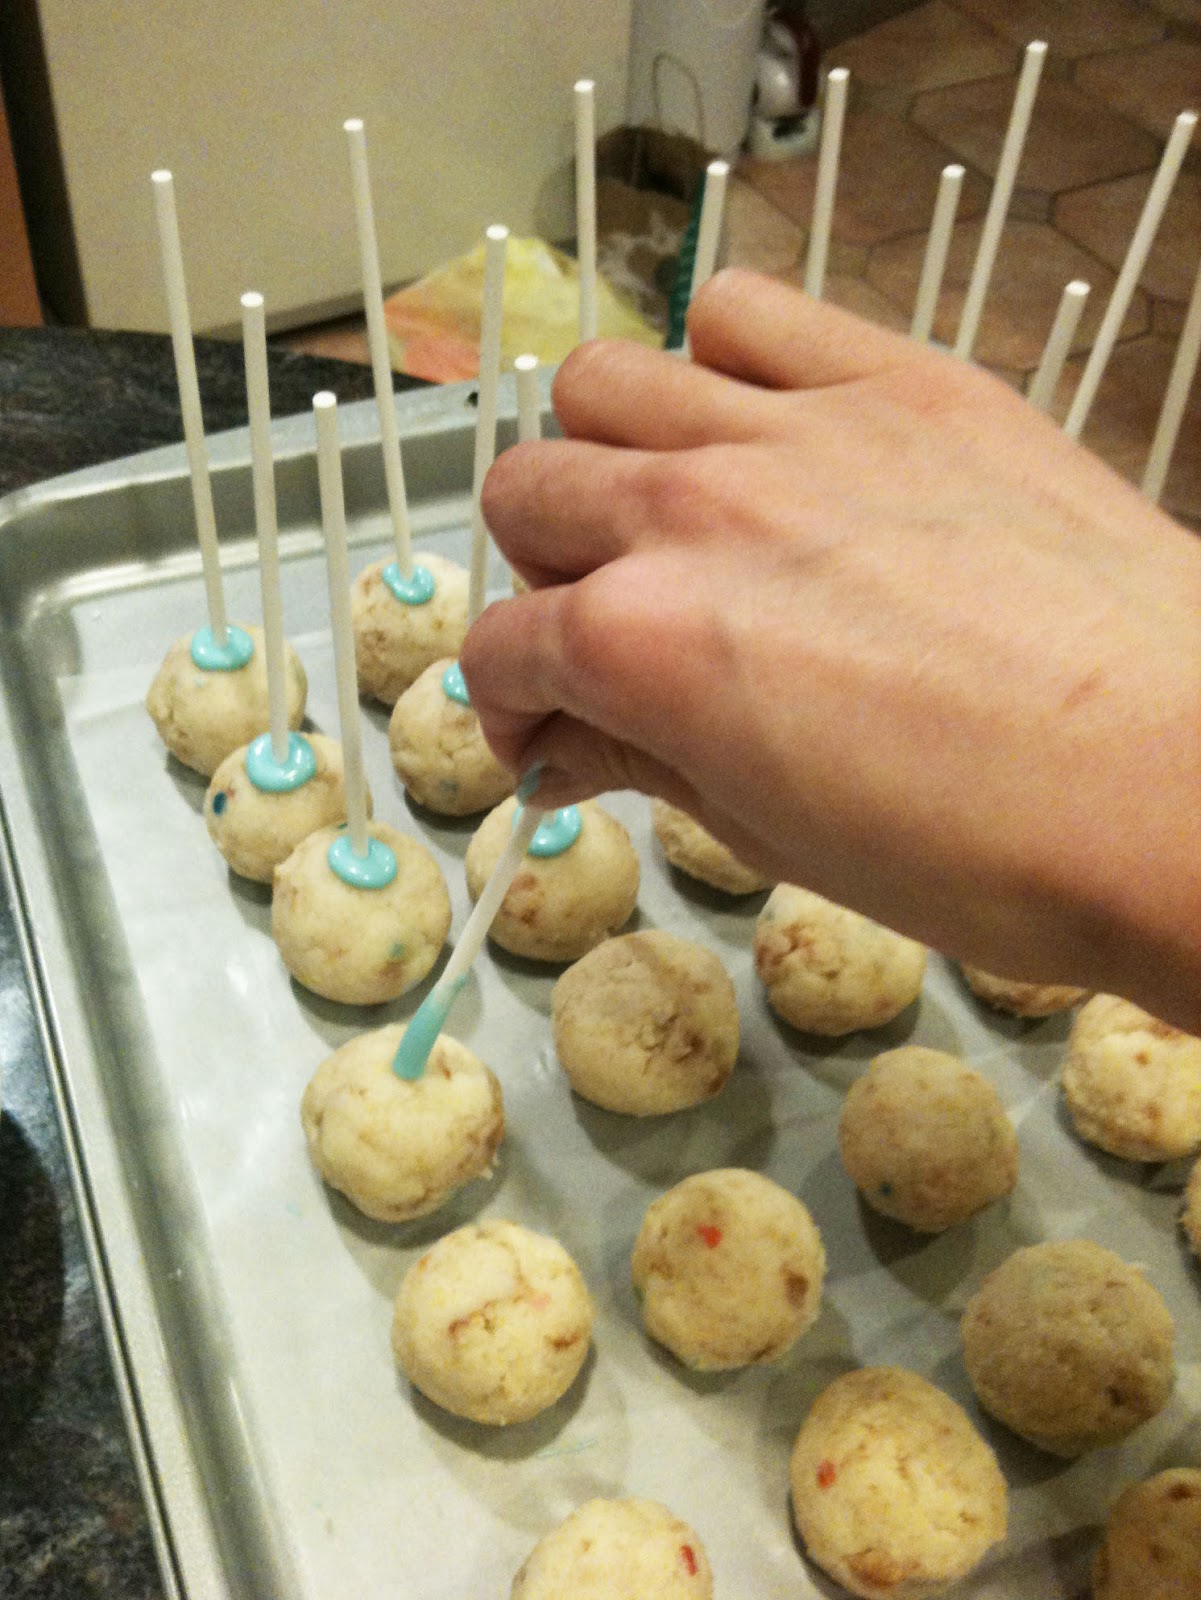


5A. Dip a the cake ball (just a little!) into the candy melt and then insert the stick into the dipped part. Place back on cookie sheet to set.
So it's a subtle difference: as opposed to dipping the STICK and inserting it into the cake ball, I dip the CAKE BALL and then insert the stick. Perhaps it's psychological. But since this minor adjustment my yield has increased and kept steady. Actually, for the batch below, I rolled out 36 cake balls and I yielded 36 cake pops. 100%!!!!! I am cake pop genius. (I also prayed before I started and went very slow. PTL). Sorry for picture #2, it's supposed to show me inserting the stick into the dipped cake ball but since I was using 2 hands, I had my mom take the photo. By the time I discovered that she took a bad angle, the battery died. It's a nice shot of my aging hand. I'm gonna leave it up as a reminder to use hand cream. True age is revealed through your hands and your neck ladies!!
So it's a subtle difference: as opposed to dipping the STICK and inserting it into the cake ball, I dip the CAKE BALL and then insert the stick. Perhaps it's psychological. But since this minor adjustment my yield has increased and kept steady. Actually, for the batch below, I rolled out 36 cake balls and I yielded 36 cake pops. 100%!!!!! I am cake pop genius. (I also prayed before I started and went very slow. PTL). Sorry for picture #2, it's supposed to show me inserting the stick into the dipped cake ball but since I was using 2 hands, I had my mom take the photo. By the time I discovered that she took a bad angle, the battery died. It's a nice shot of my aging hand. I'm gonna leave it up as a reminder to use hand cream. True age is revealed through your hands and your neck ladies!!


6. Starting from the same cake pop you started with, carefully dip the cake pop into the candy melt, rotating slowly to cover the entire cake ball. Once covered, gently rotate and tap off the excess. Don't tap too hard or the cake ball will fall off. If adding sprinkles, do it now. Set aside in styrofoam to dry and repeat with next cake pop.
I definitely need to add a picture here. This is the step that makes or breaks my mood with cake pops. You need only live within 5 miles of me to hear me wailing when a cake pop falls into my candy melt. The worst is when you're dealing with red velvet or chocolate cake and white candy melts. It is not a pretty sight. The only advice I can give is to check your candy melt consistency vigilently before each dip to make sure its still smooth and melted. You might need to reheat (just a little, 10 -15 secs?) to get it back to where you want it. Always let the candy melts rest just a little before dipping anything into it. You'll see what I mean by "seizing" when you see what happend when you dip a cold cake ball into hot candy - I will definitely remember to post a picture. Be careful when tapping off the excess and make sure it's not still dripping before you place it in the styrofoam (otherwise it keeps dripping all over). The best method to speed up the setting process is to swirl the cake pop in your hand in a counterclockwise direction with your arm. Really get into it. JK. (but I really did do this the first time when I had no styrofoam and honestly? It works).
It doesn't take too long for the candy melts to finally set. By the time you're finishing up the last of them, the first few are probably dry. Once they're all dry, you can pack them up in cello bags or in tupperware. I like to deliver/serve them within the next day or two. You can keep them in the fridge for up to a week, in the freeze for up to a month (after all, the cake is already baked!). However, if you're going to freeze them, let them defrost completely before opening up the tupperware so the don't sweat too much. (Sweat = condensation).
 |
| Get creative! the "sprinkles" on top are actualy Pop Rocks (strawberry!) for a Mad Scientist birthday party. DANGER! Do you like my french manicure? I must have been in a wedding near the time this picture was taken. |
Troubleshooting:
- You might notice that some of the cake pops seem to "crack" after the candy is set. This is usually due to the fact that the cake pops were too cold and/or the candy melts were too hot. As the cake pops come down to room temperature they expand and crack open in any of the thinner spots of the candy coating. You can re-dip them in another coating but this only works if you haven't done any sprinkles or decorating yet. I also noticed this happening a LOT (omg, like having major meltdowns a LOT) in the summertime when it's uber humid. My solution was to pump up the A/C and to run the cake pop into a styrofoam I had sitting in the fridge for EACH cake pop. This helped set the candy quickly and I think I lost some weight.
- You might notice some oil leaking out of the cake pops here and there. This is any fat (from icing or cake) that leaks out of any weak points in the candy melt. Air bubbles form in the candy melts with over mixing so try to minimize mixing AND pop any air bubbles you may notice in the candy coating with a toothpick while the candy melts are still wet (before they harden).
- You might notice that the sticks start turning yellow - again this is from fat or oils from the cake that leech down into the stick. It doesn't mean anything is wrong but it IS rather unsightly. I have not yet found any solution to avoid this but I noticed that it happens a lot less since I've minimized how much icing I use.
- I melt my candy melts in a large coffee mug. Last night I tried using a mini crock pot thinking it would keep my chocolates consistently melted but WRONG! My chocolate seized! The chocolates got too hot. So I think I can use it but will have to pull the plug here and there since I don't have a temperature control on it. Last night was a major FAIL. Thank goodness I was just playing around and not doing it for a real event!
- If you find your candy melts too thick, you can thin it out with vegetable oil or shortening. Just add a little at a time and it should liquify your consistency (about a tablespoon per pound/bag)
- You can color your candy melts in several ways: If you're lucky, the color you want already exists as candy melts are usually sold in a variety of colors. If not, you can mix candy melt colors like you would paint: red + blue = purple, red + yellow = orange, etc. You can also use color dyes specifically made for candy melts but to be honest? I have not had a huge success with this method yet. Plus you need an awful lot of dye to get your desired color and it just felt weird. Let me know if you have tips on this for me!
I think that's enough. It's Thursday and I'm tired and this blogging is awfully time consuming! Especially when you're trying to sound informative and coherent. But I still consider myself a newbie so feel free to make suggestions and give me tips!
For those that want to check out the cake pop QUEEN click here.
Good luck!
No comments:
Post a Comment