


It's simple, versatile, and pretty forgiving. I've done a lot of research and you can find a gajillion receipes for royal icing --> they're pretty much all the same with minor tweaks. Like 1/4 tsp of almond extract as opposed to 1/2 tsp. Psssht. I give kudos for all the anal bakers who like to test batch after batch with minor tweaks to find the perfect recipe. Cuz if it weren't for you, who would I steal from? JK. I appreciate all your hard work.
I'm reminded of my college days....a fellow math major and I would do problem sets weeeee into the night. Obviously since we're doing it together, we would hand in the same solutions. But I always scored slightly higher than her. We think it was due to penmanship and neatness. Hers always had ramen and soup stains on her problem sets as she worked diligently while eating. Mine were neat and legible since I was waiting for her to finish so I could copy. Hee hee. I hope she's not reading this.
Anyways, back to cookies. Actually I did try a few and honestly I didn't taste any major differences. I think with royal icing its just about making sure to add enough flavoring otherwise you're basically eating sugar and water which isn't very flavorful (though it is very sweet and again I'm reminded of another gf who likes to eat Peeps, fondant and royal icing - without the cookie/cake - I have lots of weird friends). I used to describe my cookies as bimbo cookies - pretty to look at but perhaps not much substance. Hopefully that's not the case anymore and they're as good to eat as look at.
So let's start with the basic recipe. I add the suffix "101" because obviously this is just the beginning! We haven't even started on the decorating but need to start with the basics right?
I'm still learning new tricks and I'm trying (oh so hard) to document as much as I can with pictures. But sometimes the battery dies. Or I forget to take off the lens cap (omg, it's a horrible horrible feeling to open up a folder of black pictures). Or I'm already late to a birthday dinner and making my ride tie ribbons for me so I feel bad taking more time to take pictures. The list goes on. But this blog IS making me feel more accountable (<-- I had to look up the spelling of that word in the dictionary...!) so I'm being more diligent with the photo snapping. Except for this tutorial. I'll rememer to take the lens cap off next time. Anyways, this is not that hard but I will update again with photos.
Btw, I updated my cake pop tutorial with new photos for step 5A. See? I do get things done eventually.
ROYAL ICING
2 lbs (or 8 cups) of 10x confectioner's sugar
6 tablespoons of meringue powder, slightly heaping
1/2 cup warm water
1 - 2 tsps of flavoring/extract
Confectioner's sugar = powdered sugar. You can usually buy it in a 2 lb bag which makes it easy since you don't need to even measure it out, just dump the entire bag into the mixer.
Oh, did I mention - you need a mixer. I suppose you can use a hand mixer but that's a long time you'll be standing there. On the upside, I'm pretty sure you'll get diesel if you use a hand mixer. I have noticed that my arms are slightly more toned from rolling out cookie dough. I can only imagine how ripped I'd be if used a hand mixer as well.
By slightly heaping, I mean just eyeball it so it might be a little more than an actual tablespoon measurement. Because if you're a serious baker, you know that when recipes give measurements, you're supposed to be pretty exact - ie level off the top of the measuring spoon/cup with a flat edge to have it be concise. You've been doing that right?! But for this you don't need to.
My flavoring of choice is usually almond extract. For Christmas I was going to test peppermint. Yum! Make sure you use any flavoring that does NOT HAVE ANY OILS in it. Oil and water do not mix. Remember that old chemistry lesson? You can shake it all you want but they will eventually separate out. Regular vanilla, lemon or almond extract that you buy at the supermarket is ok. But note: you should try to buy clear extract made for icing decorating otherwise your icing will be slightly tinted from the color. If you're not making white icing I suppose its ok since you'll cover it up with food coloring. But if you're looking for a crips white, make sure you get clear flavors. They sell it at Michael's and Chef Central (my favorite is online at Lorann Oils but only if I'm buying a lot because paying for shipping is a pet peeve of mine).
Make sure your water is warm. I won't even go into temperature and solubility here...actually I can't resist - it's a direct relationship!
1. Throw sugar and meringue powder into mixing bowl. Turn on mixer.
2. Add flavoring to your warm water and then pour this slowly into your dry mixture
3. Mix on low to medium speed for 8 - 12 minutes.
That's it! In the beginning your icing will look a gooey and ivory in color. After about 8 minutes though you'll see it fluff up, lose its shine and turn bright white. If it looks a little TOO stiff (ie your mixer starts making noise or starts moving across the counter) then add a little bit more water, a teaspoon at a time. When you lift the icing up, it should stay up in a peak (and not fall back in) - it's that stiff. This is your base icing.
 |
| After ~2 minute: icing is a pale ivory in color and gooey looking |
 |
| After ~4 minutes: icing is starting to thick |
 |
| After ~6 minutes: Icing becomes noticeably whiter, thickening and growing in volume. (I noticed the switch from the ivory paste to white frosting somewhere between minute 4 and 5 but don't hold fast to these time markers) |
 |
| After ~8 minutes: Icing continues to whiten/thicken/increase in volume. |
 |
| Done! When you lift the beater up, the icing stays on the beater. This is just your base icing. From this point you will have to add water to achieve the consistency you want/need for icing. I like to store icing at this consistency if I am not going to use it imeediately since the water tends to separate over time but I've never seen it happen at this level. |
The recipe makes a pretty large batch. Should be able to ice about 4 dozen cookies. You can portion it up into tupperware and put in the fridge. Remember to add a layer of saran wrap touching the icing so that it doesn't dry out.
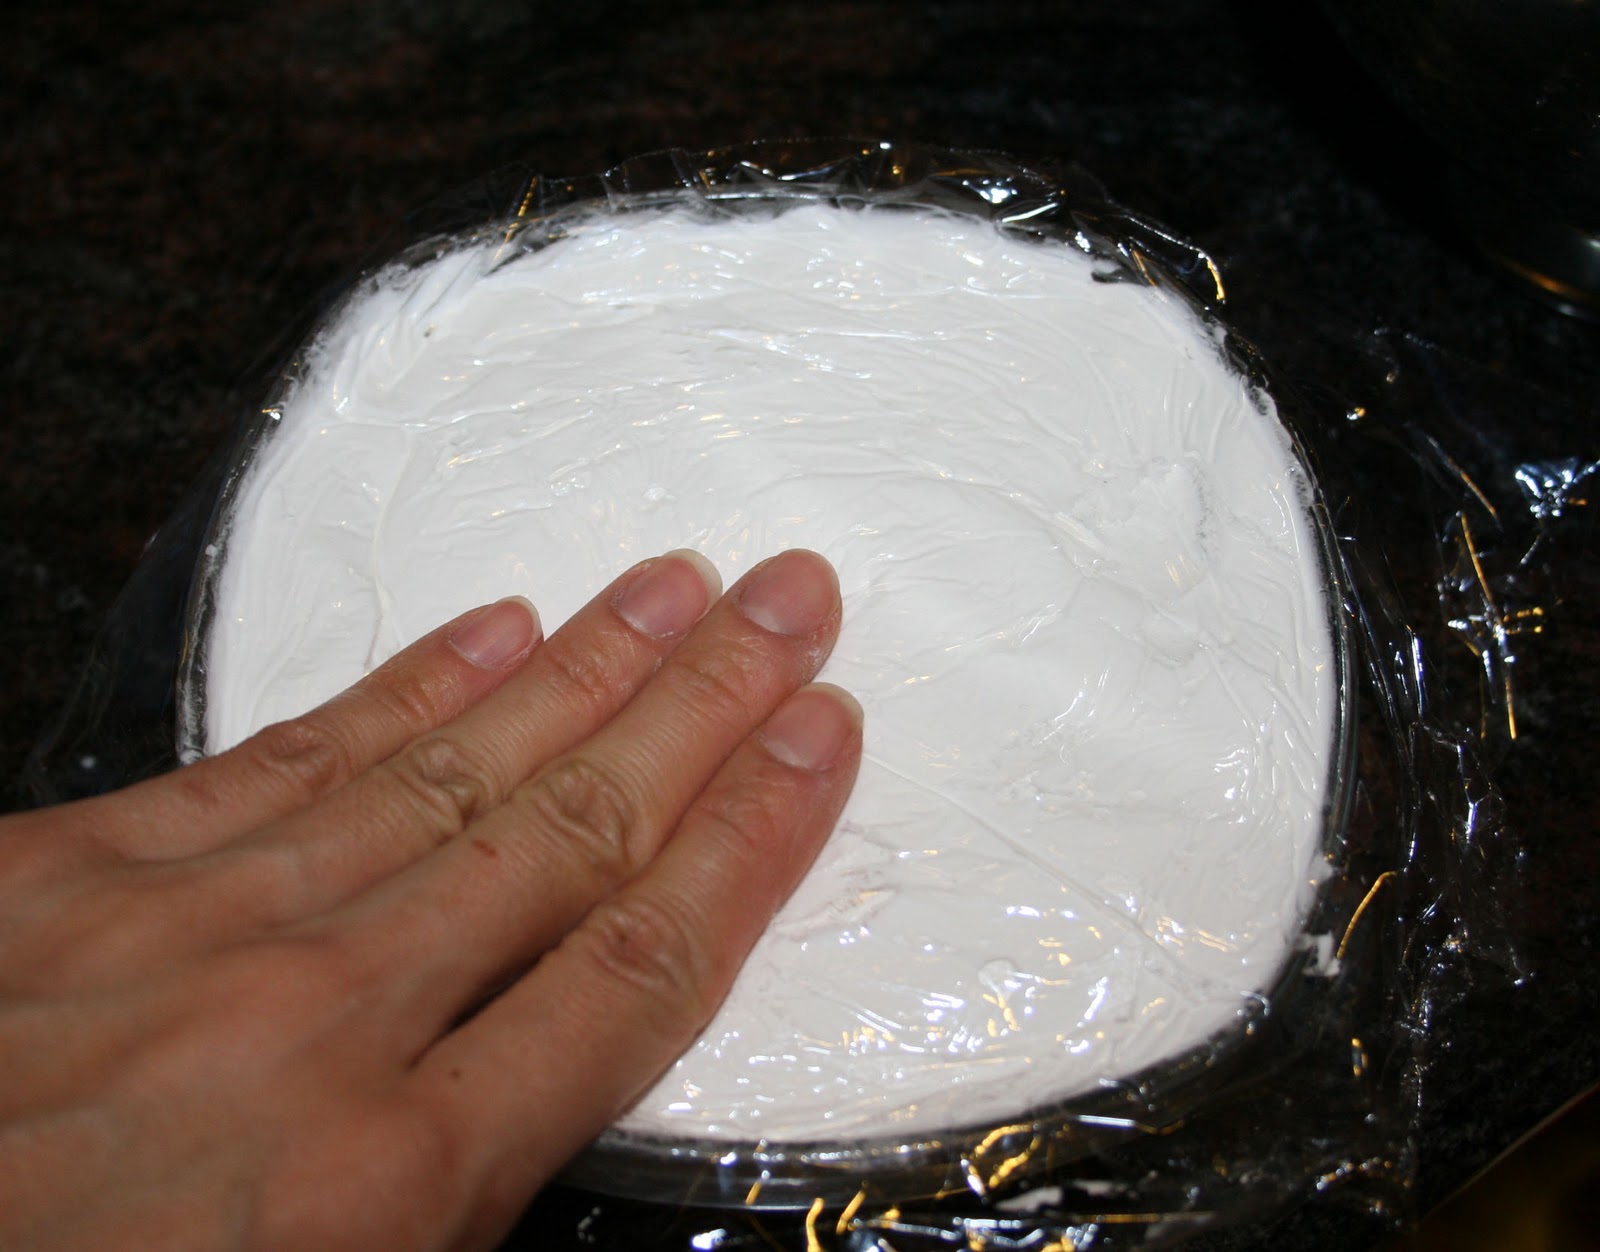 |
| Cover the icing with a layer of saran wrap before covering with the lid. Press down on the saran wrap so that its touching the icing (so air can't get in and dry it out) |
 |
| Not enough icing to completely fill the tupperware? No problem. Just make sure you push down on the saran wrap layer so its making full contact with the surface of the icing |
 |
| Add caption |
 |
| Packed and ready for storage! |
So there's your icing.
I'm pretty sure you'll want to dive right into decorating but hopefully I'm not your only cookie resource right now because...I'm tired. Writing coherent thoughts drains me. So decorating will have to be covered in RI 102. Until next time.... (please cover your icing so it doesn't dry out until the next post...)
No comments:
Post a Comment